This tutorial is tested with Window Vista and Window 7.
Did you find it really annoying when you want to boot up your computer to hurry look at something but it takes a very long time for that to happen? Well, there's a good news. It can be fixed!
There's a very simple trick to that. It is based on the fact that machines with multiple processing units can be used to speed up the booting process.
Now, let's start. Go to Menu > msconfig.

Once the System Configuration window is opened, go to the boot tab.

Once the System Configuration window is opened, go to the boot tab.

Once the boot tab is selected, you will see the Advanced Options button. Click on that.

A new window named BOOT Advanced Options will open. Make sure the Number of Processors box is checked.
From the drop down menu, select "2" for the number of processors (or other value if you have more that 2 processors). Just click 'OK'.

On the System Configuration window, click 'Apply' and then 'OK'.
A small pop up window will pop asking you to Restart.

ANOTHER METHOD
Well, there's also another way you can try - by enabling the Boot-Only fetching feature.
By enabling this feature, more resources will be reserved for the booting process (rather than reserve for booting and application launching). Just go to Menu > Regedit.

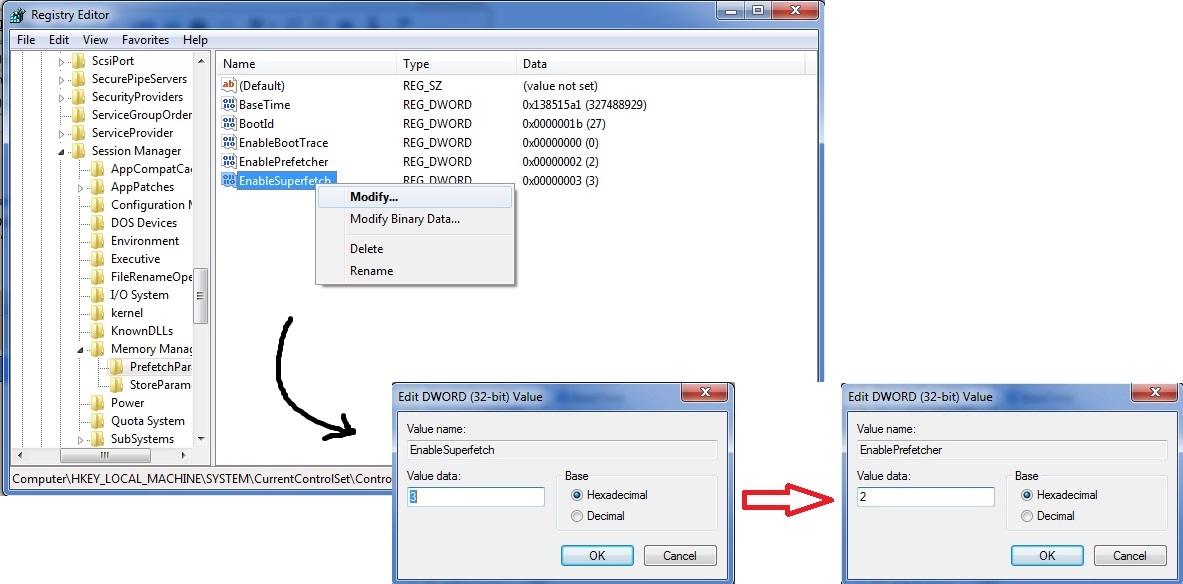
Once the Registry Editor opened, go to:
HKEY_LOCAL_MACHINE\ SYSTEM\ CurrentControlSet\ Control\ SessionManager\ MemoryManagement\PrefetchParameters.
At the right pane, right-click on EnablePrefetcher and select 'Modify'.

Change the Value data from "3" to "2". And click 'OK'.

Do the same for EnableSuperfetch. Right-click on EnableSuperfetch and select 'Modify'. Change the value from "3" to "2" and click 'OK'.
Then, close the window to exit Registry Editor and restart your computer for the changes to take effect.
Tutorial by basicxtutorial.
Tutorial by basicxtutorial.


0 comments:
Post a Comment